Raspberry Pi Programming For Beginners
Last Update: Jun 7, 2024
I wrote a book! Check out A Quick Guide to Coding with AI.
Become a super programmer!
Learn how to use Generative AI coding tools as a force multiplier for your career.
Want to learn how to write some apps for the Raspberry Pi? Today I’m going to kick off a new series of tutorials related to the Raspberry Pi and programming. This is a series that will be aimed at beginners, but seasoned programmers may want to take a look as well. The Raspberry Pi was created for education, tinkering and bringing technology to the far parts of the world. This is a mission I firmly stand behind, so I’m doing my part to throw some new stuff out there to get people excited about becoming a programmer with this awesome device.
Why Python?
Python is arguably the biggest programming language on the Pi right now, for good reason. It has lots of tools, is well supported and development is really fast. Plus it’s easy to learn. It’s very powerful and you can even create simple games and graphics with it. I think it’s a great language to get started with as you’ll see some instant results.
Tools we’ll be using
We are going to be using Python and IDLE for our first part of the tutorials, and these are already installed and present if you’re using the Raspian image. Here is what IDLE looks like:
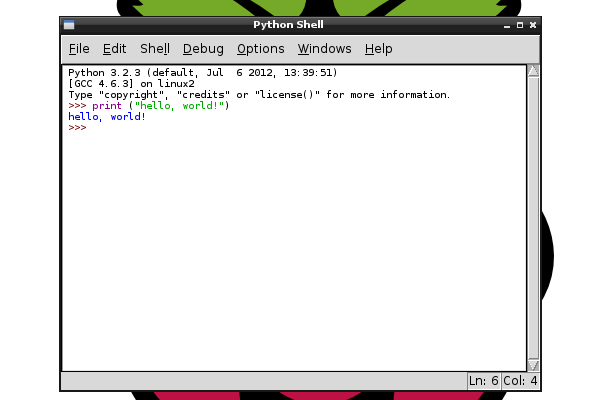
This is our Python console and editor. We’ll be using this extensively to create our programs. While there are many IDEs out there, it’s always good to start with the console, and learn a little how Python works. This is it! There’s no long list of tools to download, you can get started programming Python right away with the default Raspian image.
Let’s get started!
Let’s get comfortable with the Python environment. For this tutorial we’re only going to be covering some basics using Python version 3.2.3. We’ll run a few commands at the console to play with output, but we’ll want to create an file later to make programs that are actually useful.
At the prompt (where it shows >>>) you’ll want to type in the commands I show and press enter.
1. Using the prompt
At the prompt you saw how you could output text, but you can also do arithmetic at the prompt. Type in the following and press enter:
3 + 2
As you can see, it outputs the answer. But you can also use multiple operators and expressions.
((3 + 2) * 5) -3
and you’ll see 22. It’s not terribly useful at this time, but it’s nice to know it’s available.
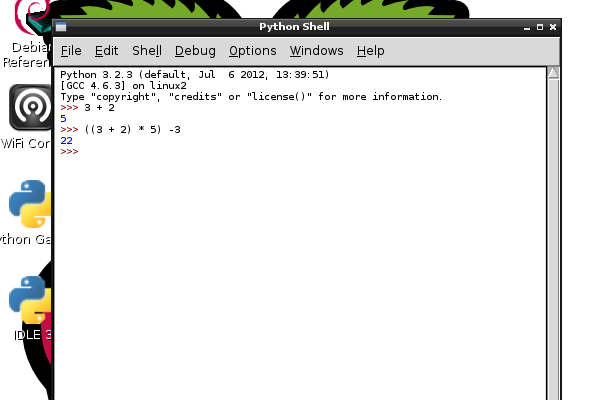
Most of the time you’ll use the prompt for setting configuration parameters. For any real useful programs you’ll want to create a file containing a list of commands.
2. Creating a file to run
Let’s create a file and run some stuff. In the IDLE 3 window, select File -> New Window
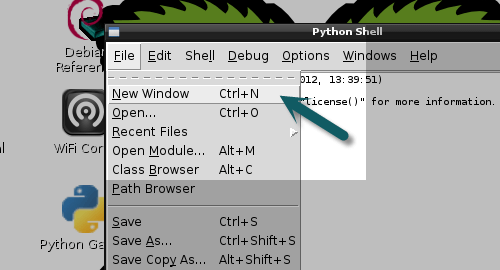
You will see a new window that comes up, and that’s where you’re going to be putting your code. Then you can save it to a text file that Python can run.
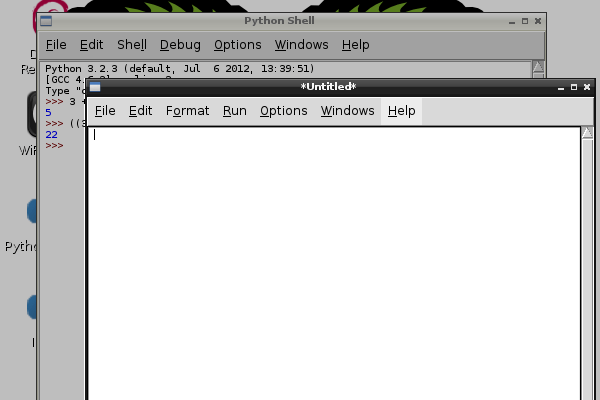
In this window, type in the following code:
# my first Python script
then, go to File -> Save
You should see a window that looks like this:
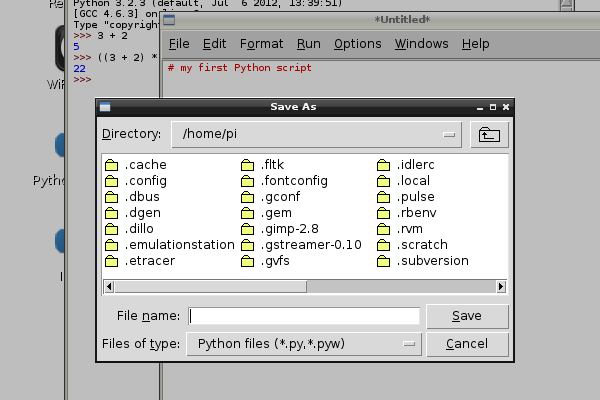
Type in a file name like “myfirstprogram.py” and click save. Now everything you put into this file will be saved and interpreted by Python.
Python is an “interpreted” language, which means the Python program will read a text file line by line and act based on the commands you give it. This is different from a compiled language like C where you a compiler reads the code and creates a program. We’ll do some C programming later in the series and you’ll see the differences later.
Input and output
Now that you know how to create a file we can play with some input and output. First I should let you know that the file you just created won’t exactly do anything. That’s because all we did was put a comment in the file.
A comment is something that’s ignored by the Python interpreter. The purpose of a comment is to leave yourself notes, or leave notes for other programmers. This makes your program easier to understand.
Let’s make our file actually do something. Type in the following:
print "this is output"
Now, go up to the Run menu, and select “Run Module”
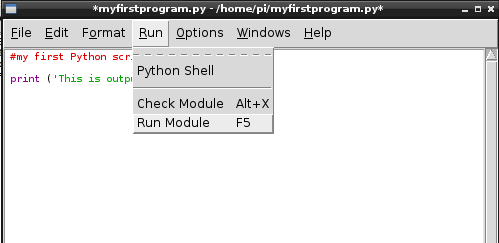
Once you select this you’ll get the following message:
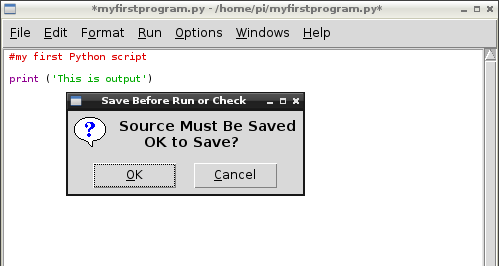
This is a message telling you to save your file before running it. Click OK.
Now this file will close, and back in your terminal window you’ll see the following:
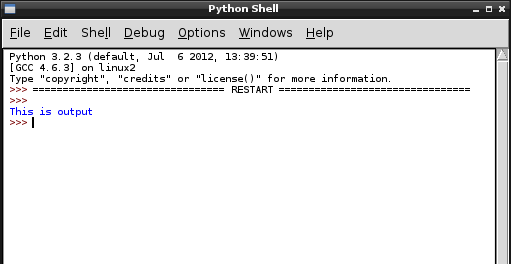
Congratulations! You’ve created output. But that’s just the start.
Ask for and display a name
Go back to your editor window (it’s still open) and erase everything. Put in the following lines:
name = input('What is your name? ')
print ('Hi', name, 'how are you?')
now, click on Run-> Run Module again.
You will see a prompt that’s asking your name:
What is your name?
As you probably predicted, you should type in your name. Press enter.
You should see this:

Pretty cool huh? So how does this work?
You created a variable called “name”. A variable is a storage space for data. When you create a variable it sets aside some space for you to put things in and take them out, and gives this space a name so you can access it later.
When you created name, you assigned it the value from the input() method. The primary job of Input is to collect data from the keyboard. Inside the parentheses is a space where you can “pass” data to input. This text is what it displays before input tries to accept data. This is generally used for prompts like this.
You used print to output a string. When you “pass” data to print it gets output to the screen. So you passed in a string ‘Hi’ which by itself would work. But by putting in a comma afterward you are adding to that string. You used something called concatenation.
You then appended (added on) the name variable. Notice how it has no quotes around name. This is how you tell Python that it’s a variable. You have quotes about ‘hi’ and ‘how are you?’ to let Python know that’s a string, and then you added the three together.
Lastly you output your newly built string.
This is great example of input and output. Let’s do a little more, just for fun. Now type the following into your editor:
#my first python script

name = input('What is your name? ')
age = input('How old are you? ')
city = input('What city do you live in? ')

print ('The author of this program is ', name, 'who is ',age, 'years old and lives in ' city)
Now, go to Run -> Run Module.
You will see that it now asks you a series of questions, and once you fill it out, it will display a line back to you after putting all the data together:
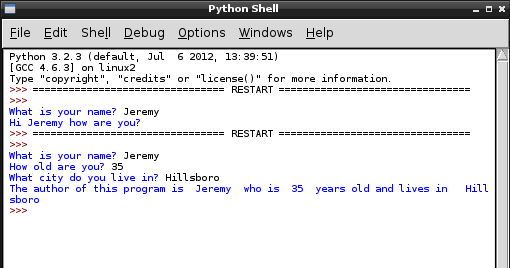
It’s that easy!
Summary
While we really didn’t dive that deep into programming the Pi, or even Python I hope this will at least give beginners a general idea of how to get started. I will be adding some more detailed tutorials in the future, but if you can’t wait and really want to keep going check out the Python 3 Tutorials at Python.org.
You don’t have to stick with Python 3 either. Python 2.6 is still in very active use and there are actually more packages available for it if that’s what you’d prefer. Both versions are very good and it doesn’t hurt to learn them both.
In future tutorials we’ll explore python deeper, and even get into some other languages such as C++ and assembler. I’ll also show some more useful things you can do to get you really pumped about programming on the pi.
If you have any questions, Let me know!!
Want to learn more about the Raspberry Pi? Check out the Raspberry Pi for Developers course!


