How to Build a REST API with Python
Last Update: Apr 2, 2023
this article I will describe the process I used to create a new endpoint for my Raspberry Pi weather station, and how I set it up to to use Python and MariaDB for storage. I set this up as an endpoint for one of my IoT projects and thought I’d share the results.
Background
If you’ve been following my Raspberry Pi Weather Station tutorials, I set the first one up to use Firebase as a data store. I found it somewhat clunky to work with and I wasn’t very happy with my options. I’m not sure this is the type of data best suited for Firebase. So in the second iteration I used a .Net Web API on a Windows Azure website and had it store to a MS-SQL database. This was a really good solution.
I started getting a flood of emails with people asking for a more open source endpoint. Granted ASP.Net is open source, but some complained about the cost of hosting it. If you wanted to keep the database in house you’d have to pay for windows license and a SQL server for instance. Another issue was some people were developing in Linux or Mac, which makes interfacing with ASP.Net difficult (though they are working on that). Long story short I decided to create a Linux friendly solution and decided upon Python/Flask with MariaDB.
Why Python? Why MariaDB?
I chose Python because I’ve always loved the language from my first line of code. It’s simple, elegant and does a lot of things very well. I had never written a Web API with it, so I thought I’d give it a shot.
MariaDB is a fork of MySQL that is maintained by the founder, and superior to the original in many ways. Since it’s a drop in replacement I can still use the MySQL tools I’m familiar with. It seemed like a good fit.
Get Started
Get your Linux server ready. For this task I chose to use a Digital Ocean Server running Debian. If you must use Ubuntu, put “sudo” in front of everything.
The first thing you’ll want to do is update everything:
apt-get update
apt-get upgrade
Next we’ll get the database set up.
1. Install MariaDB
As I mentioned, MariaDB is a drop in replacement (upgrade really) of MySQL. You’ll need to add the repository:
apt-key adv --recv-keys --keyserver hkp://keyserver.ubuntu.com:80 0xcbcb082a1bb943db
Then add it to your sources:
nano /etc/apt/sources.list
And add the following to it:
# MariaDB 5.5 repository list
deb http://ftp.osuosl.org/pub/mariadb/repo/5.5/debian wheezy main
deb-src http://ftp.osuosl.org/pub/mariadb/repo/5.5/debian wheezy main
save and close the file
Now run the following:
apt-get install mariadb-server
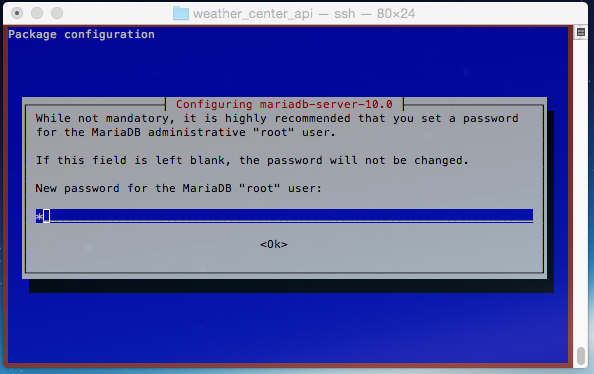
You will see a screen like this that will ask to set your root password:
To add some additional security settings, run
/usr/bin/mysql_secure_installation
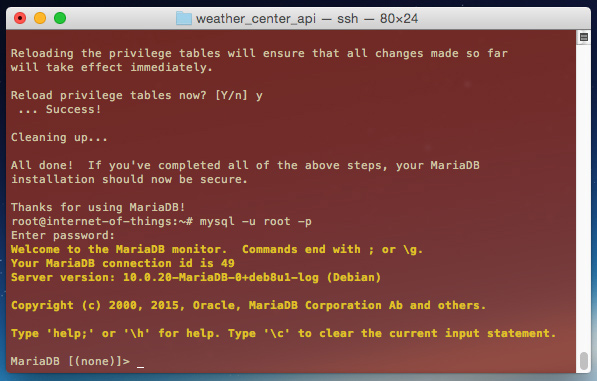
After that you can log into your MariaDB server:
mysql -u root -p
To make it accessible from outside the server, you’ll need to make a change to my.cnf:
nano /etc/mysql/my.cnf
Look for “bind-address” and change it:
bind-address = 0.0.0.0
Save the file and close it.
Now restart the server:
service mysql restart
You should now be able to connect to your server from the outside.
2. PYTHON / SQL Connection
In order to connect to MariaDB you’ll need to install a couple things:
apt-get install libmariadbclient-dev libssl-dev python-mysqldb
You’ll also need to download the mysql connector.
wget http://ftp.kaist.ac.kr/mysql/Downloads/Connector-Python/mysql-connector-python_2.1.3-1debian8.2_all.deb

dpkg -i mysql-connector-python_2.1.3-1debian8.2_all.deb
This will install it the proper files to use the MySQL connector module.
3. Set up Python Flask
Next, we’re going to use Python Flask for the REST interface. Flask is written in Python and a very fast, powerful and stable way to connect.
mkdir source
cd source

apt-get install curl

curl -O http://peak.telecommunity.com/dist/ez_setup.py

python ez_setup.py

easy_install pip

pip install flask
This will set up Flask on your machine. Now let’s build a sample API to test it out.
4. Set up a test endpoint
We will want to add a web user (or whatever you want to name it) to set up this application.
I would like to give a shout to Miguel Grinberg for all the work that he’s done setting this up! I learned a lot from his tutorials.
adduser web

su web

cd ~

mkdir weather-api

cd weather-api
Now we want to create a file called app.py and make it look like this:
#!flask/bin/python
from flask import Flask

app = Flask(__name__)

	@app.route('/')
	def index():
		return "Hello, World!"

	if __name__ == '__main__':

		app.run(debug=True)
Next, we’ll want to set it to be executable, then execute it.
chmod a+x app.py
./app.py
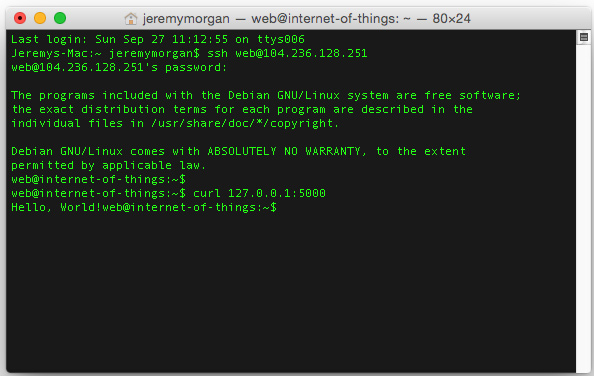
Now create a new SSH session and type the following:
curl 127.0.0.1:5000
You will see a hello world message:
Next, change it to have some actions:
#!flask/bin/python
from flask import Flask, jsonify

app = Flask(__name__)

tasks = [
	{
		'id': 1,
		'title': u'Buy groceries',
		'description': u'Milk, Cheese, Pizza, Fruit, Tylenol',
		'done': False
	},
	{
		'id': 2,
		'title': u'Learn Python',
		'description': u'Need to find a good Python tutorial on the web',
		'done': False
	}
]

@app.route('/todo/api/v1.0/tasks', methods=['GET'])
	def get_tasks():
		return jsonify({'tasks': tasks})

	if __name__ == '__main__':
		app.run(host='0.0.0.0')
Notice at the bottom I put in
app.run(host=0.0.0.0)
This will allow your API to be accessed from the outside.
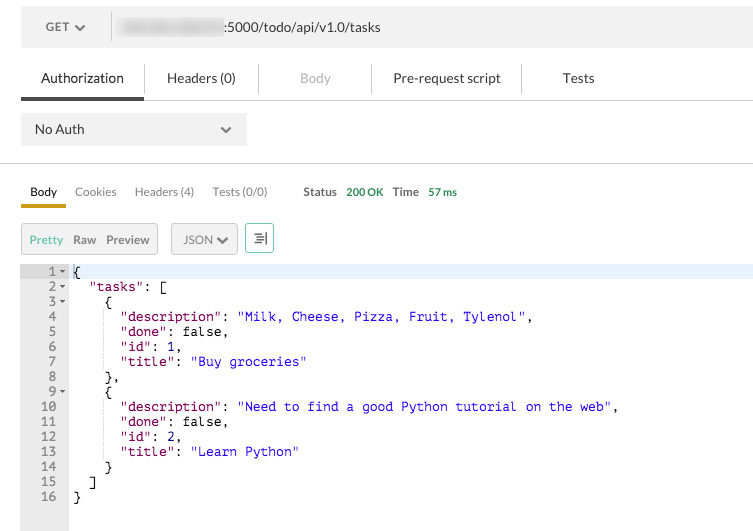
Now, get POSTMAN or something similar and point it at your URL. Send it a GET:
{YOUR IP}:5000/todo/api/v1.0/tasks
and it should look like this:
Congrats, you have Flask working. For security you should install and implement httpauth later down the road.
pip install flask-httpauth
5. Set up MariaDB for the Weather Station
Now we will set up a database for the weather station endpoint.
CREATE DATABASE weather;
GRANT ALL PRIVILEGES ON weather.* TO web@'%' IDENTIFIED BY 'secretpassword';
FLUSH PRIVILEGES;
quit
Log in as that web user:
mysql -u web -p
You will be created with an SQL prompt. Type the following:
use weather;

CREATE TABLE `weather`.`reading` (
  `readingID` INT NOT NULL AUTO_INCREMENT COMMENT '',
  `TempSensor1` DECIMAL(20,10) NULL COMMENT '',
  `TempSensor2` DECIMAL(20,10) NULL COMMENT '',
  `TempSensor3` DECIMAL(20,10) NULL COMMENT '',
  `TempSensorAvg` DECIMAL(20,10) NULL COMMENT '',
  `Humidity` DECIMAL(20,10) NULL COMMENT '',
  `Pressure` DECIMAL(20,10) NULL COMMENT '',
  `Altitude` DECIMAL(20,10) NULL COMMENT '',
  `SeaLevelPressure` DECIMAL(20,10) NULL COMMENT '',
  `Lux` DECIMAL(20,10) NULL COMMENT '',
  `TimeStamp` VARCHAR(45) NULL COMMENT '',
  PRIMARY KEY (`readingID`)  COMMENT '');
This creates your MariaDB database for storing items.
6. Set up Flask for the Weather Station
For this rather than dump the code on this page, just check out the endpoint from my github repo:
git clone https://github.com/JeremyMorgan/Raspberry_Pi_Weather_Station_PY_API
You’ll need to change the values in datastore.py to match your credentials.
start it up as you did before:
./app.py
Note, if you want to run as a service in the background:
nohup ./app.py &
()I’ve had mine up for about 2 weeks now without crashing)
Now, you can add a new reading like this:
curl -i -H "Content-Type: application/json" -X PUT -d '{"TempSensor1":"23"}' http://localhost:5000/weather/api/v1/readings
But how do we add this as an endpoint for the Rasperry Pi Weather Station project? Easy! Just point it to your Linux endpoint instead of the Azure/.Net one in readings.py:
url = '[YOUR URL]'
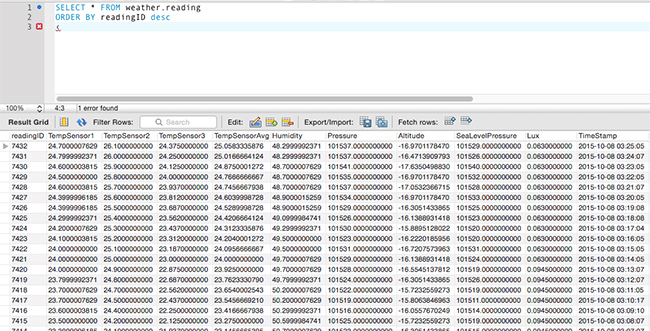
And you’re set! All your results will be stored by the minute in a MariaDB database:
Conclusion
While this is specific to an endpoint I created for my project it’s a good outline for building a REST API with Python in Linux. It’s a very stable and performant way to collect data. The work on Flask has made it incredibly easy to get an API up and going quickly. I hope to do more cool stuff with it in the future and I hope you do too.
Follow @JeremyCMorgan


